
|
|
Early rehabilitation exercise for ACL injuries to help regain proprioception Where possible all exercise should be carried out with an assistance on hand to offer aid should the need arise. Time frame is 3-5 weeks but each athlete rate of recovery may differ and should be taken into consideration. Injured athletes should progress through each activity at their own pace and move on when they can carry out each task accurately and comfortably. Evaluation should be done each day after each exercise to ensure that progress is made so that the exercise regime can be modified accordingly.
Exercise 1-5 is primarily for range of motion (ROM), extension, flexion and also to allow small amount of load and tension to go through the incorporated graft making its collagen fibres distribute more evenly, thus becoming more like ligament fibres. The exercises should be started on the first day post operation.
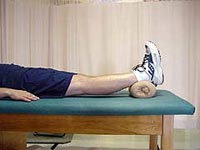
Exercise 1 Heel Prop After ACL surgery the knee becomes stiff and range of motion is lost, particularly in extension. Heel prop exercise trains the knee to slowly regain full extension similar to the uninvolved side. Care should be taken not lift the heel too high at first, try to let gravity at first bring the knee into extension, rather than actively extending it. Over pressure should also be avoided at the outset. Each set should be for 20 seconds (1 x 20s) and should be done 3 times per week.
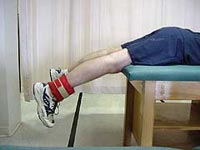
Exercise 2 Prone Hang This exercise is also use to increase range of motion in extension. The athlete lie in the prone position with the legs hanging off the bed just above the knee. This will force the knee into extension through gravity. hold this position for 5 minutes or longer. The aim is to get the heel height of the injured leg similar to that of the uninvolved leg. This can be done 1-3 times per day up to 3 times per week, depending on the athlete's rate of progress. See the image for demonstration.
Exercise 3
Towel Extension
To do this exercise, wrap a towel around the feet, use one hand to hold the towel and the
other to put pressure just above the involved knee. Gently pull the towel towards you to slowly bring the
involved knee into extension. Care should be taken not to apply to much over pressure, as this could make the
injury worse and delay rehabilitation. This exercise can be done 1-3 times per day and up to 3 times per
week.
Exercise 4
Wall Slides Flexion
Place both legs up against a wall, extending the involved leg just above 90 degrees. The
uninvolved leg should be under the involved leg for support. Relax the involved leg and lower the supporting
leg to bring the involved leg as far down as possible into flexion, hold for 2-3 seconds then use the
supporting leg to aid in bringing back the involved leg to the starting position. This can be done up to 3
times daily for up to 8 reps 3 times per week. See video for demonstration.
Exercise 5
Heel Slides Flexion
Sit on the floor or on a bed, slowly slide the heel of the involved leg towards the
body to bring the knee into flexion. Mid way through the movement use both hands to wrap around
the knee to support it into flexion. Make sure it is not pulled in too close to the body to avoid
injury. Hold for 2-3 seconds then slowly slide the heel to the starting position. Up to 8 repetition
can be done 3 times per day, up to 3 times per week. See video for demonstration.
Exercise 6 is included to strengthen the Vastus Medialis Oblique
(VMO) muscle. A weak VMO contributes to ACL injury in females. Also deliberately
isolating the VMO for strengthening requires training neuromuscular control to help recruit the muscle
fibres, thus aiding the restoration of proprioception. This exercise can be started on the third day
post operation.
Exercise 6
VMO Strengthening
Sit on the edge of a bed with the feet of the involved leg turn slightly
outwards, gently press or dig the heel into the ground to activate and contract the VMO. Hold for
about 5 seconds. Do 3 sets of 8 reps. It can be done up to 3 times per day, 3 time per week. If
you can not feel the contraction in the VMO try changing the angle at which the heel is placed. Avoid
vigorous contraction if its too painful. See video for demonstration.
Exercise 7-9 are mainly to restore neuromuscular control through the use
of small dynamic movement (exercise 8-9). Exercise 7 is used to train the athlete in
re-establishing neuromuscular control with will help in sensory perception, thus resulting in better
control of the dynamic movement. Can be started on the third day post operation and depending on the
athletes rate of progress.
Exercise 7
Making "Foot Fist"
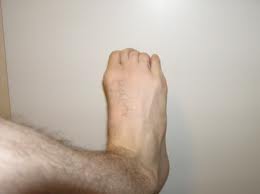
Athlete stands on both legs and try to curl the toes to
form the foot into a fist. This helps to restore neuromuscular control which is in carrying out
dynamic movement. This should be 3 x 15 reps and can be done up to 3 times daily 3 times per week.
See image.
Exercise 8
Leg Exercise with Crutch
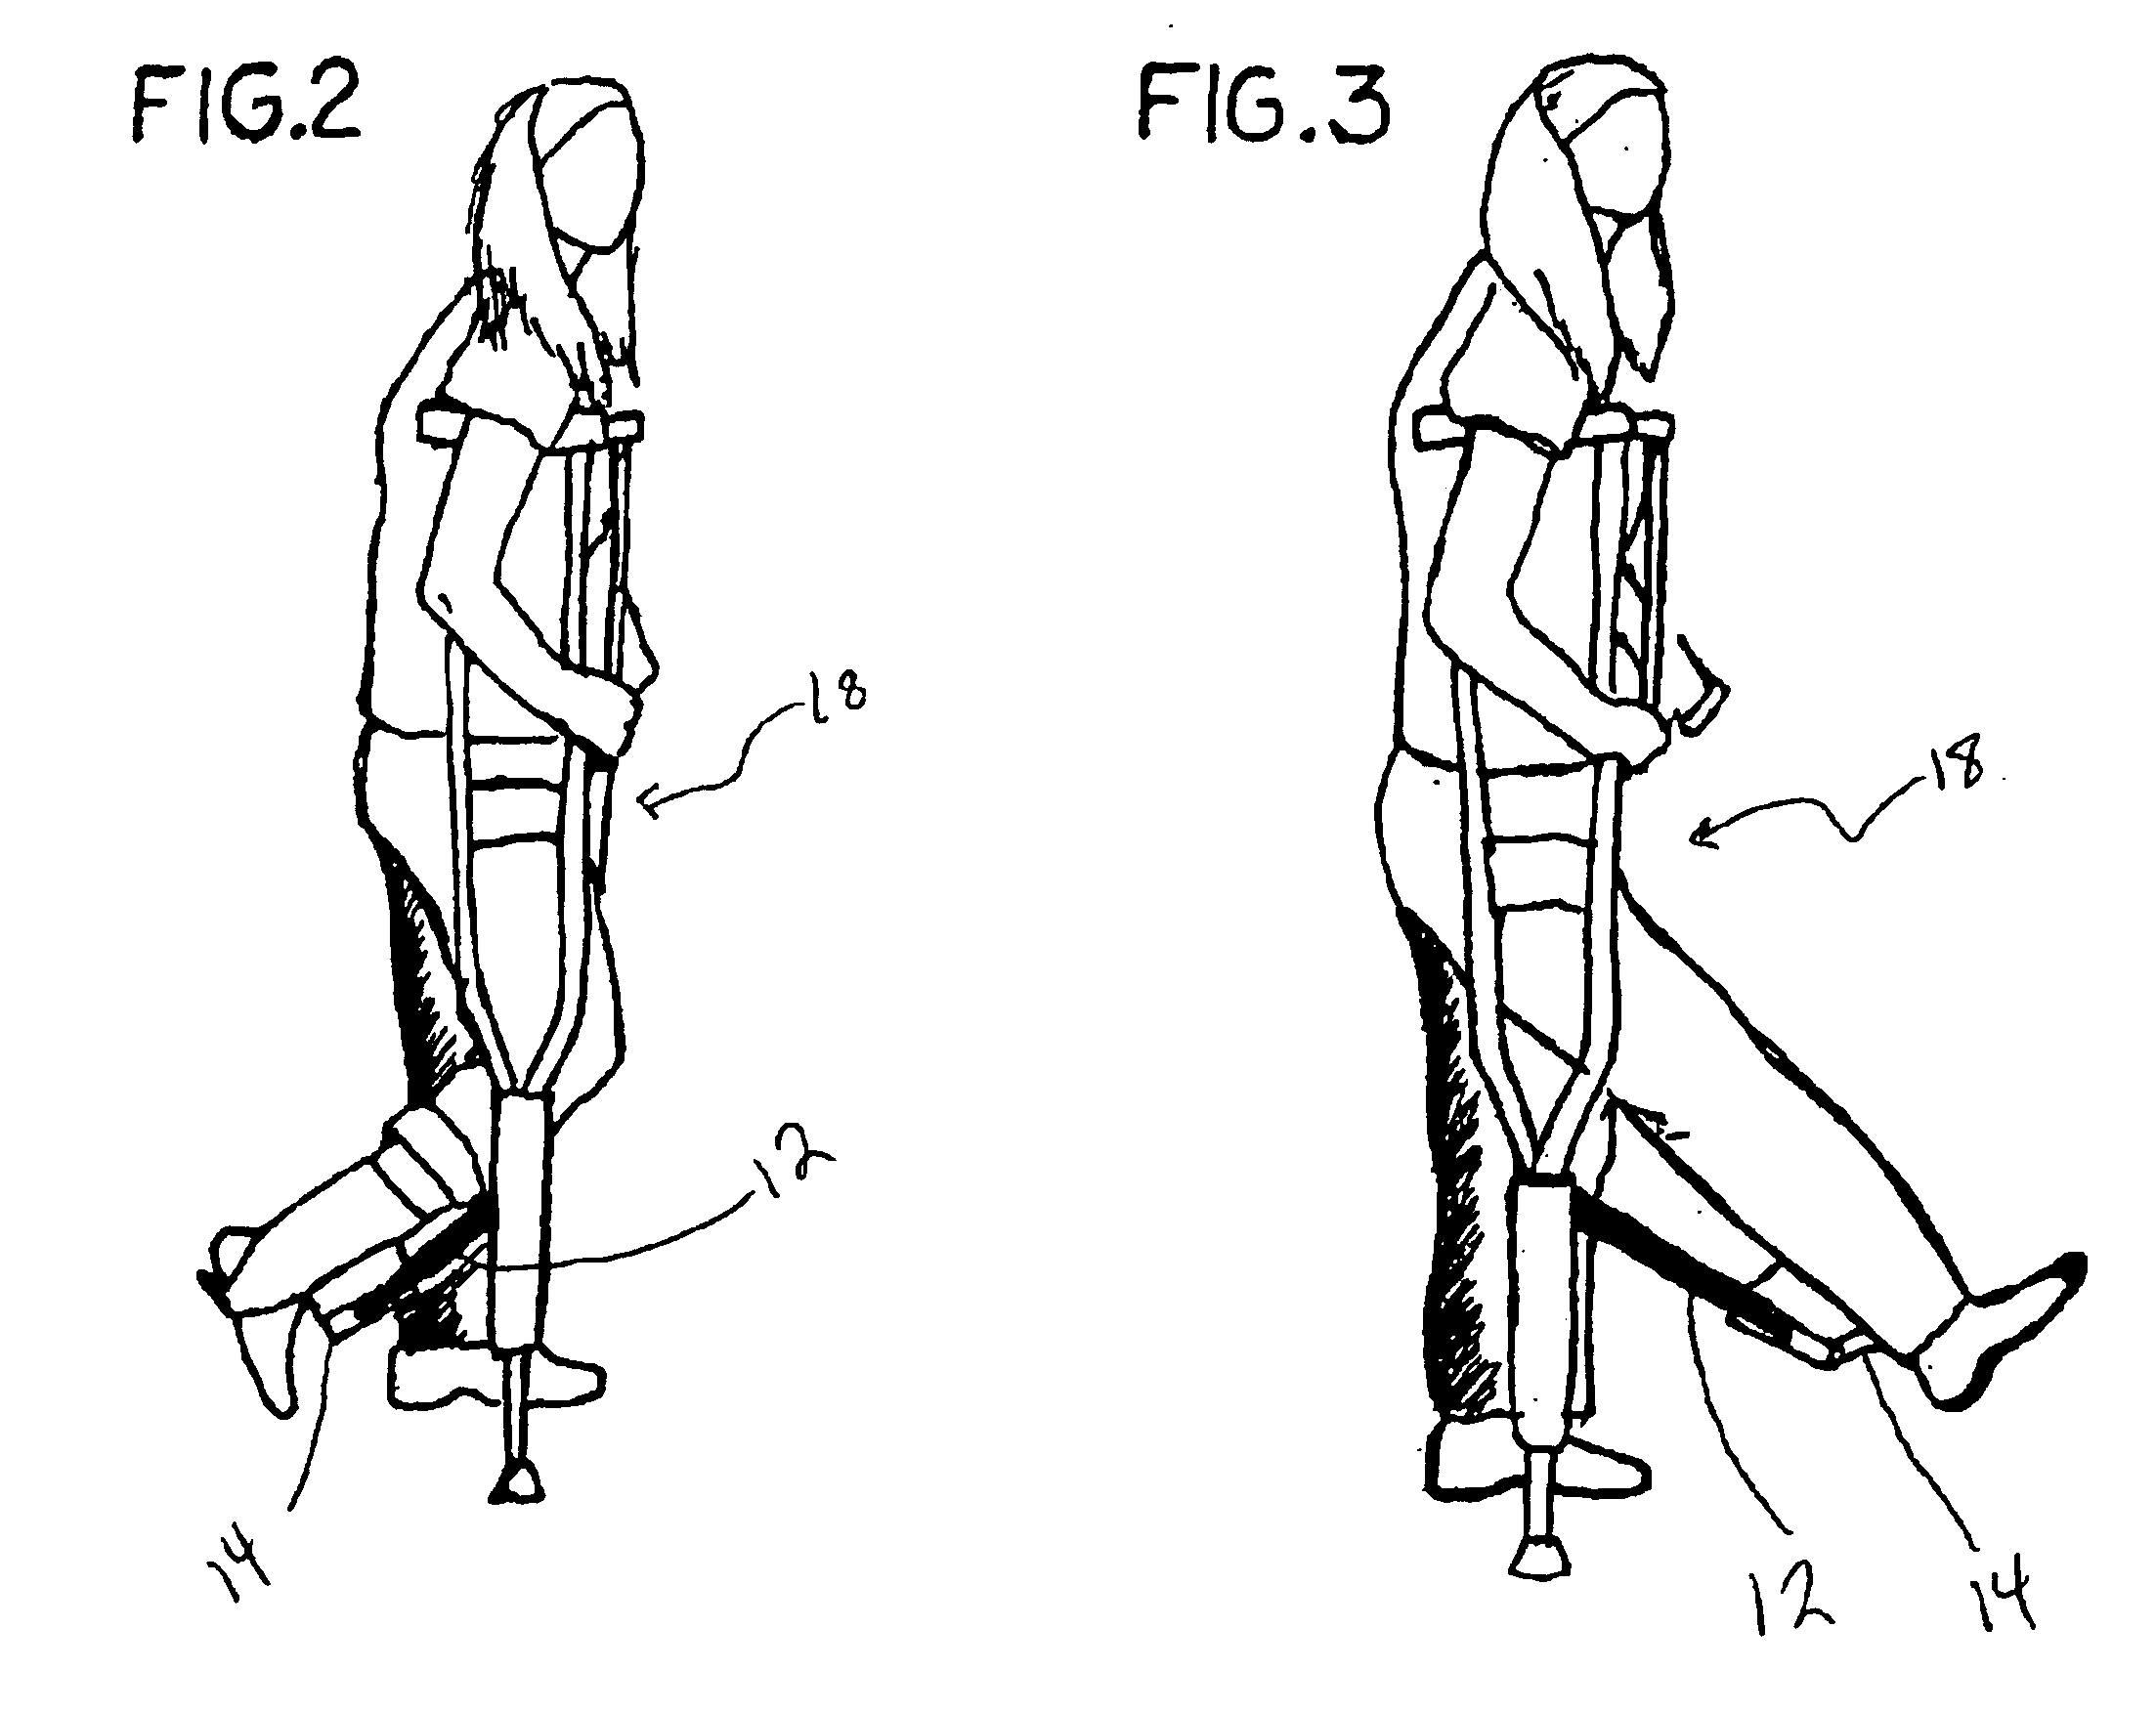
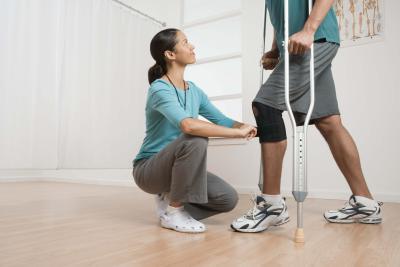
Athlete stands on the uninvolved leg with the aid of crutches and slowly
dynamically move leg backwards and forward within the limits of pain. Slightly bend the knee when
bringing the leg back to effectively clear the floor. This can be done for up to 5 minutes 3 times per
day, 3 days per week. See image for an example.
Exercise 9
"Leg Alphabet"
Athlete stands on the uninvolved leg and with the aid of both crutches and gently and
slowly use the uninvolved leg to write the letters of the alphabet. Do one set 3 times per week. The
example in the video is done without crutches, it should only be done in this manner when gait is restored.
Therefore we advise the use of crutches to aid with safety until it can be done without. Also try not
to lift the leg this high initially and if all the alphabet can not be done all at once, take a break then
start again.
Exercise 10-14 aims to improve balance by coactivating the different muscle groups to
anticipate sudden change and stress on the joint, so that injury prevention mechanism can be
initiated. This also helps to restore optimal gait pattern which is essential for the latter part of
rehabilitation. These exercise can start in week 2 give and take a few days depending on
athletes rate of progress.
Exercise 10
Standing on Both legs
With the aid of the crutch the athlete stands with most of her body weight on the
uninvolved leg, then slowly transfer her weight to the involved leg until it is equally distributed on both
legs. It may take a few attempts to be able to equally distribute weight on both legs, so progress at
your own pace. For progression the athlete's aim is to stand on both legs without aid. Each standing
exercise should last for up to 5 minutes and should be done once per day 3 times per week.
Exercise 11
Bilateral Calf Raise
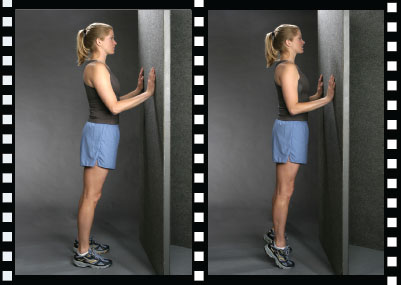
Stand facing a wall, leaning forward slightly for balance. Use your calf muscles to
push body up on toes as far up as possible. Hold for 5-10 seconds then relax. This exercise helps to regain
balance and strengthen the calf muscle to aid in gait re-education. Do up to 8 sets once per day 3 times
per week.
Exercise 12
Early Gait Re-education
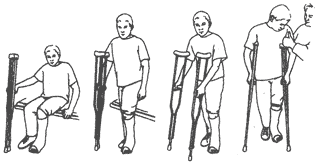
Athlete stand with the aid of crutch, then gently step forward with the
involved leg. This position is maintained, then gentle pressure is put through the leg. Hold for
5-10 seconds then bring leg back and relax. The athlete should try not to step too far out as this will
result in poor balance and not enough pressure on the leg for the exercise to be effective. Up to 3
sets of 8 can be done 3 times per week.
Exercise 13
Early Gait Re-Education
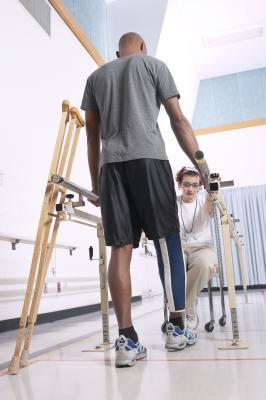
Athlete with the aid of therapist and parallel bars, walks slowly to the end of the
rails and back. Most of the body weight should be on the uninvolved leg and rails to begin with, then
ultimately seek to equally distribute weight on both legs. Up to 8 sets can be done 3 times per week. See
image for example.
Exercise 14
Early Gait Re-Education
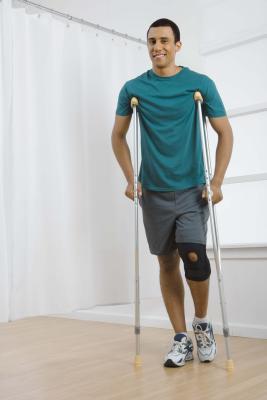
At this point athlete tries to walk with just the aid of the crutches. Again, most of
the weight should be on the uninvolved leg to start with, then ultimately, equally distributed on both
legs. Start off by using the injured leg to lead and with the aid of the crutches take some of the
weight off while trying to bring the involved leg forward. Athlete should aim to walk around for 5-10
minutes 3 time per day, up to 3 times per week.
|
|
|||

